My Favorite Squarespace features that make designing easier
Designing a website as a small business owner can feel overwhelming—especially when you're faced with dozens of platforms, confusing features, and tech jargon. I’ve been there, too.
When I launched my business back in September 2024, I was searching for a website builder that was easy to use, beautifully modern, and powerful enough to grow with me.
After testing the options, Squarespace quickly became my go-to—

and now, it’s the platform I use every day as a professional website designer and template shop owner.
In this post, I’m sharing my favorite Squarespace features that make designing easier, whether you’re a DIY business owner building your site for the first time or a creative pro looking for a streamlined, stylish solution.
These are the exact features that helped me (and now help my clients) create professional, strategic websites—without any coding required. From drag-and-drop layouts to built-in SEO tools, here’s why Squarespace is a no-brainer for modern small business websites.
Layout blocks:
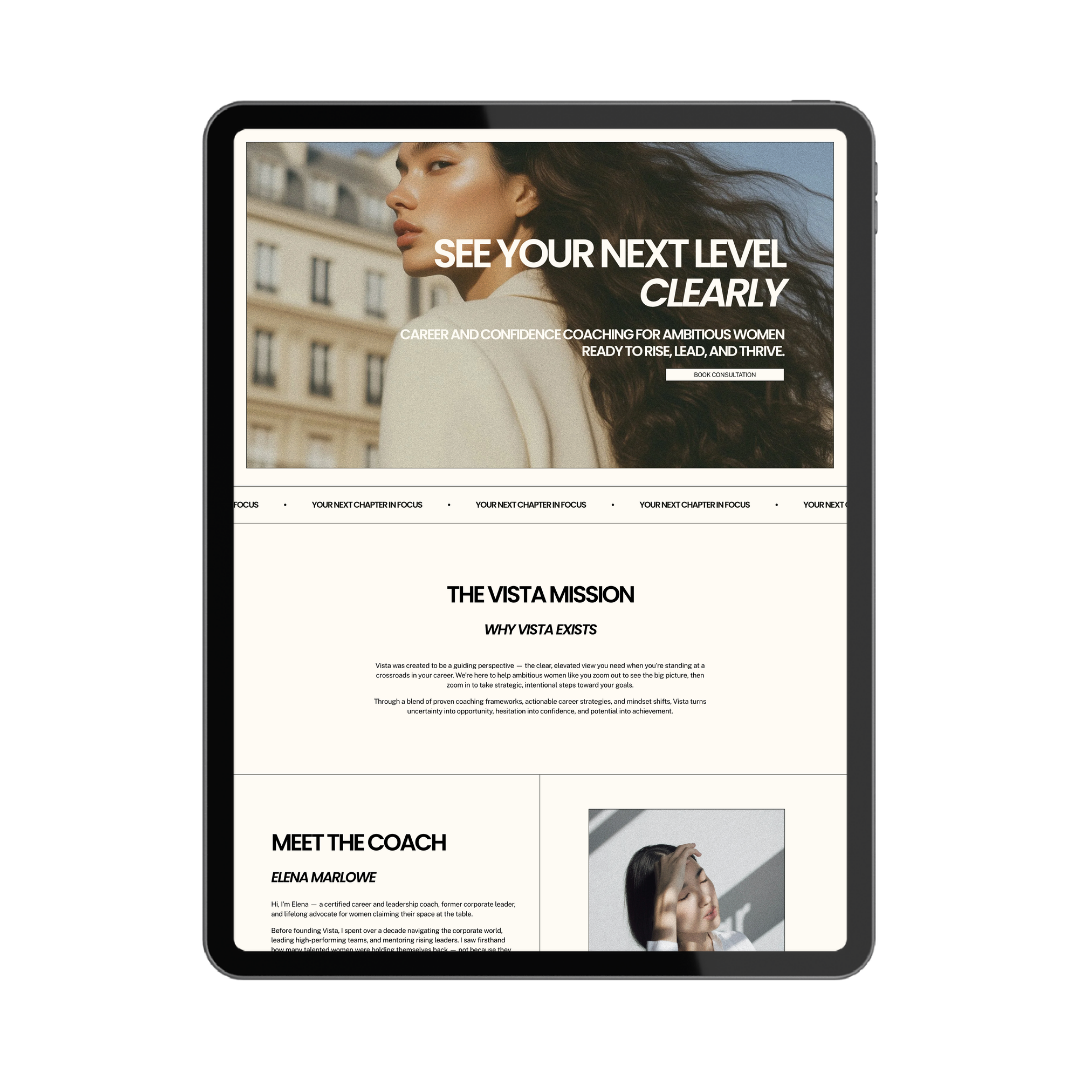
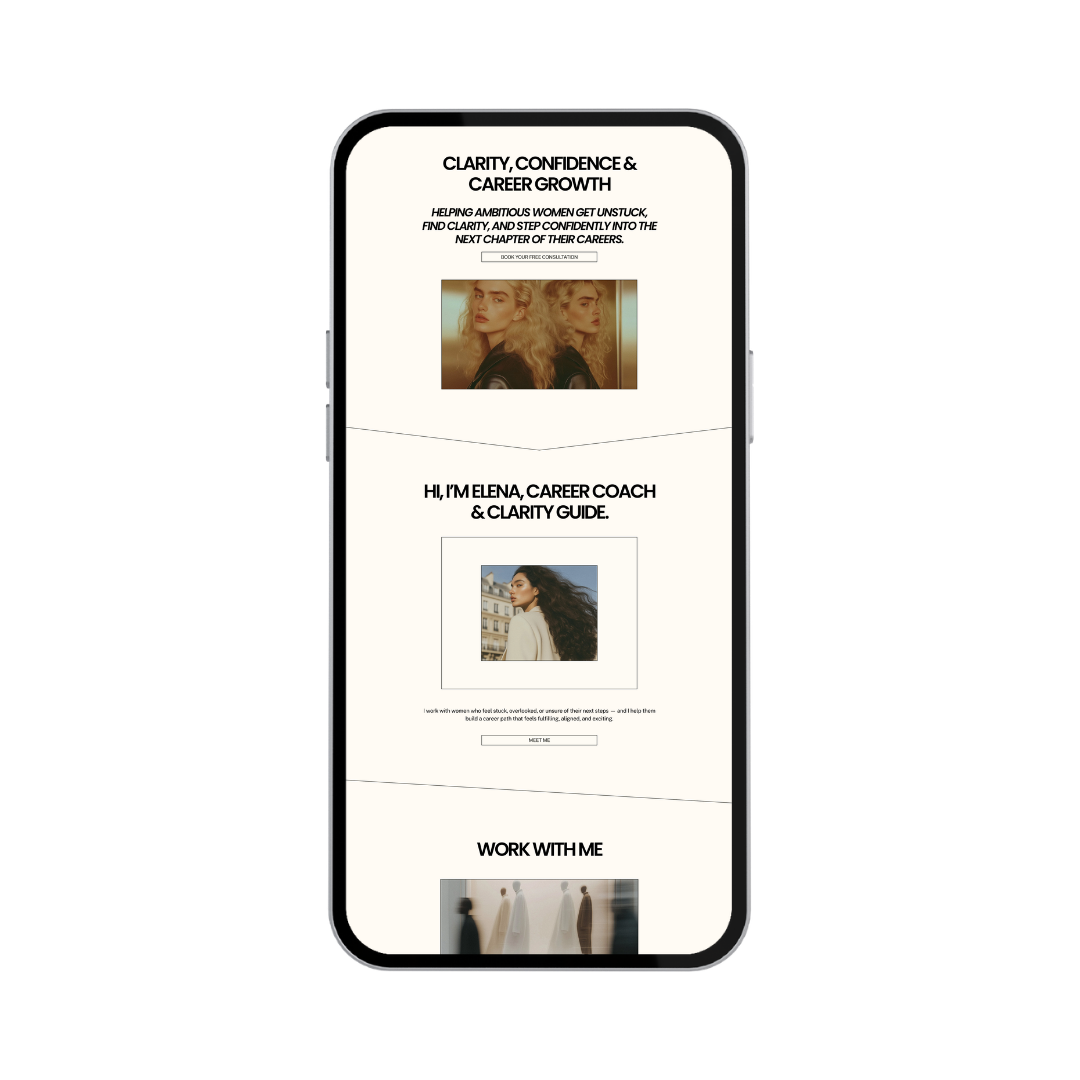
One of the best parts about using Squarespace to design your website is how simple it is to create custom layouts—exactly the way you envision them. A feature I use constantly are the Squarespace layout blocks.
Each section on your page can be customized using a variety of content blocks—like text, images, buttons, videos, forms, and more.
This gives you full creative control without needing to write a single line of code.

Here’s how to add a block in Squarespace:
➡️ Hover over the section you want to edit
➡️ Look for the “+ Add Block” button in the top-left corner
➡️ Click it to browse and select from all available blocks
Whether you're building a homepage, sales page, or blog layout, Squarespace’s drag-and-drop blocks make web design easy and efficient—especially for small business owners and creatives designing their own sites.
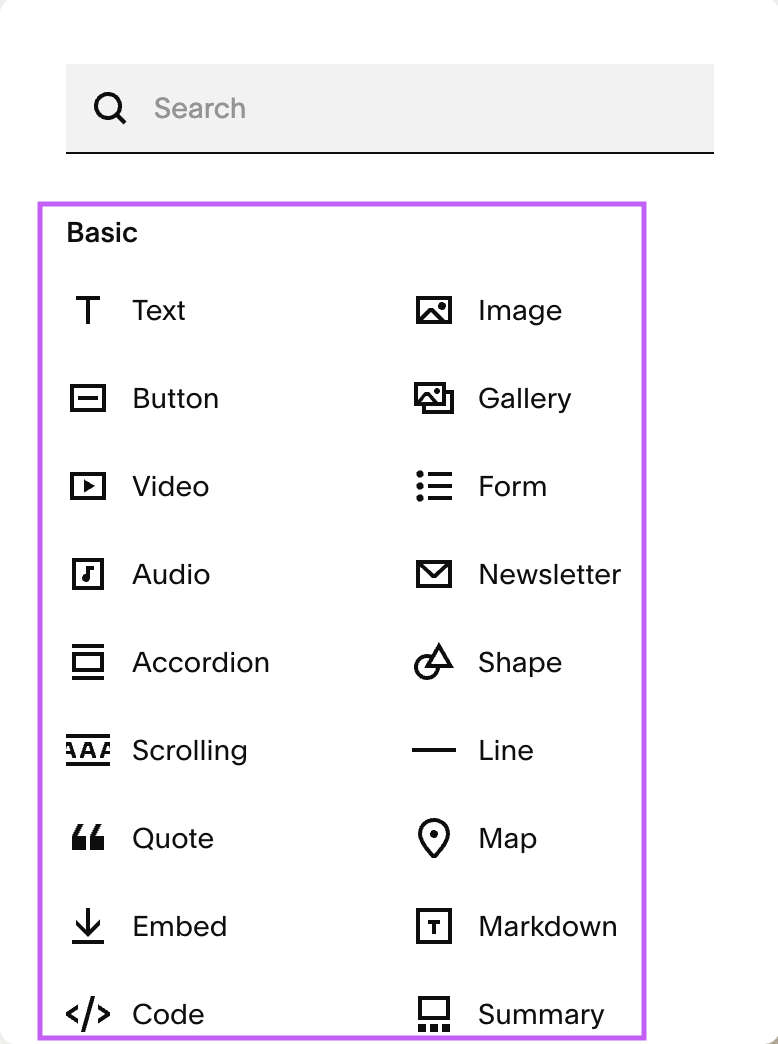
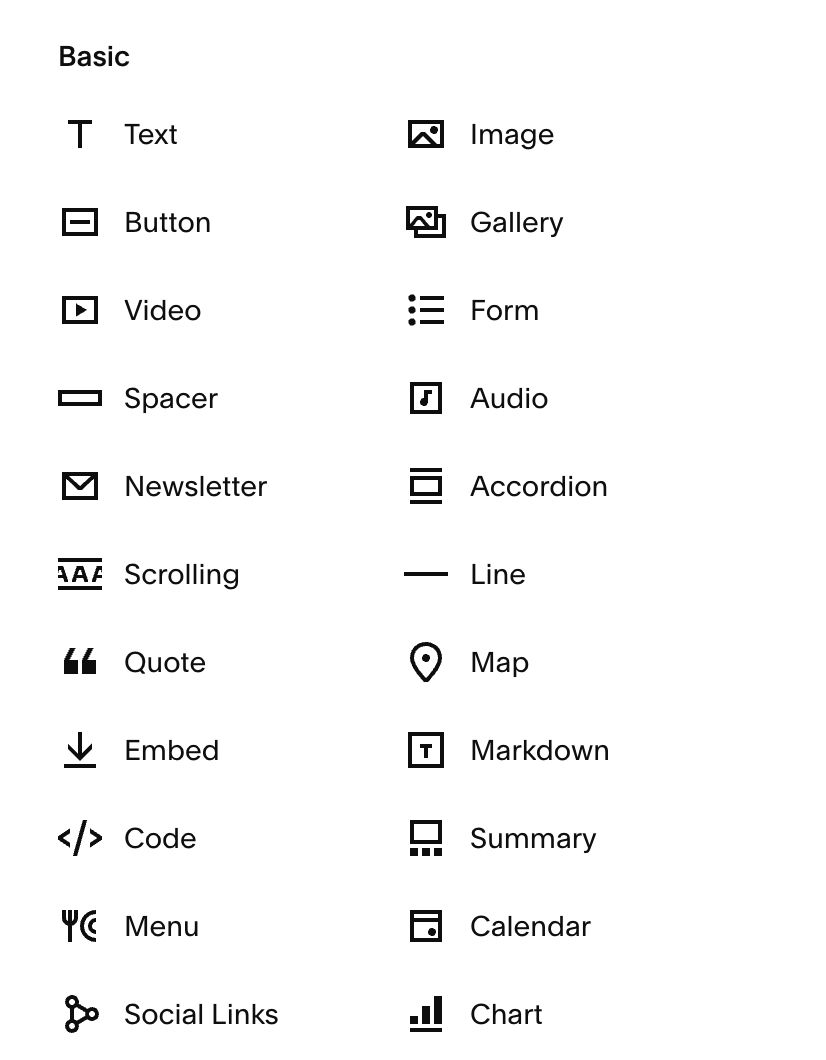
Here’s a breakdown of the different Squarespace content blocks available for use in each section of your website. Personally, I rely most on the options found under the “Basic” block category—they’re simple, versatile, and perfect for creating clean, professional layouts.
From time to time, I also use select blocks from the “Business” and “Integration” categories, especially when I’m adding more advanced functionality like forms, commerce tools, or third-party embeds.
Don’t be afraid to get creative with your Squarespace layout!
With just a few clicks, you can overlap images, add text overlays, apply image effects, customize form styles, and even edit image shapes—all without touching a single line of code.


These block and formatting tools give you the flexibility to build a website that’s not only functional, but also uniquely aligned with your brand. Whether you’re going for minimal and modern or bold and expressive, Squarespace makes it easy to design a site that feels like you.
We’ll dive deeper into specific design ideas and best practices in future blog posts—but for now, know that Squarespace’s intuitive, DIY-friendly features truly set it apart from other website platforms.
Style Editor:

If you're a small business owner building your website with Squarespace, you’ll love how easy it is to create a polished, consistent design across your entire site—without spending hours tweaking every button, color, or font individually. Squarespace’s Site Styles editor allows you to update your site’s overall appearance quickly and efficiently.
To get started, simply click the paintbrush icon in the top-right corner of the Editor. From there, you can easily adjust fonts, colors, button styles, and more—all in one place.
Squarespace’s Global Style Editor is a powerful tool that helps you maintain a consistent look across your entire site—without editing each element one by one.
It’s a major time-saver and an easy way to keep your branding cohesive.
Site-Wide Customization Options:
Let’s dive into the powerful customization tools available to help you create a site that perfectly reflects your brand.
To follow along, click the paintbrush icon in the top-right corner of your Squarespace editor. This will open the Site Styles panel, where you can customize everything from fonts and colors to spacing, animations, and more—all in one place.
Color Palette:
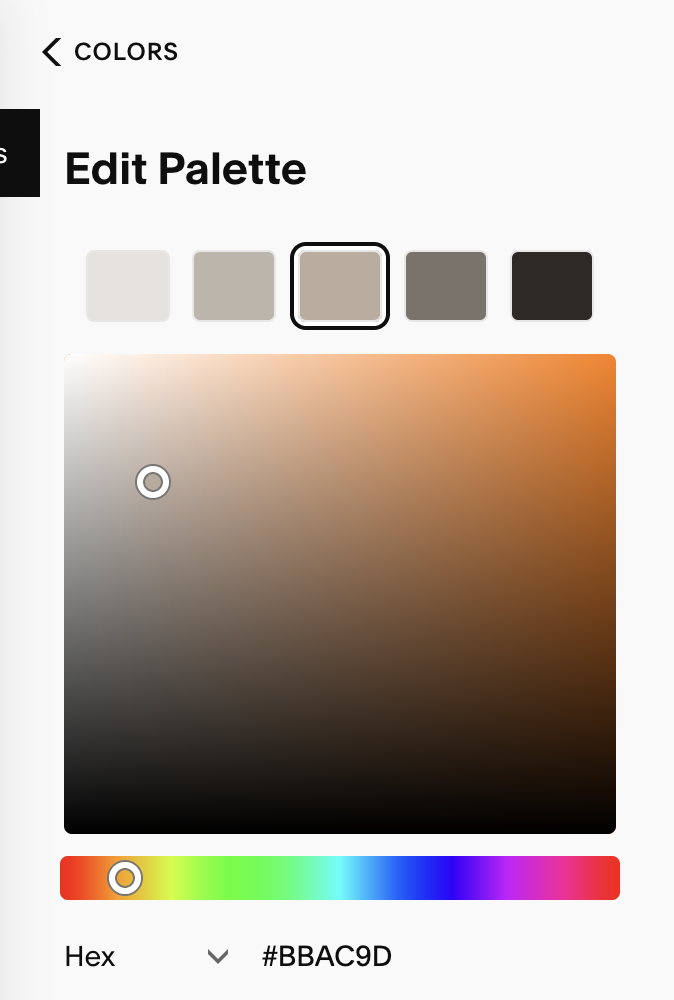
When you first start building your Squarespace website, you’ll choose a Theme, which includes a default color palette and font pairing. This is a great starting point, but to create a truly unique and branded experience, you’ll want to fine-tune these settings.
Not sure where to start with your website colors? Pinterest is a great place to discover color palette inspiration that aligns with your brand's vibe. Once you’ve found a palette you love, simply copy the Hex, RGB, or HSL codes and paste them into each color slot in your Squarespace editor—starting from the lightest shade to the darkest.
For example, here’s what my (current) Story Reimagined brand color palette looks like:
Font Combinations:
Choose fonts that align with your brand’s personality—whether that’s modern and minimal, bold and creative, or classic and professional.
Pair your fonts thoughtfully to maintain a clean and cohesive look across your site.
This is where your brand identity really comes to life—so have fun with it, and don’t be afraid to make it your own!
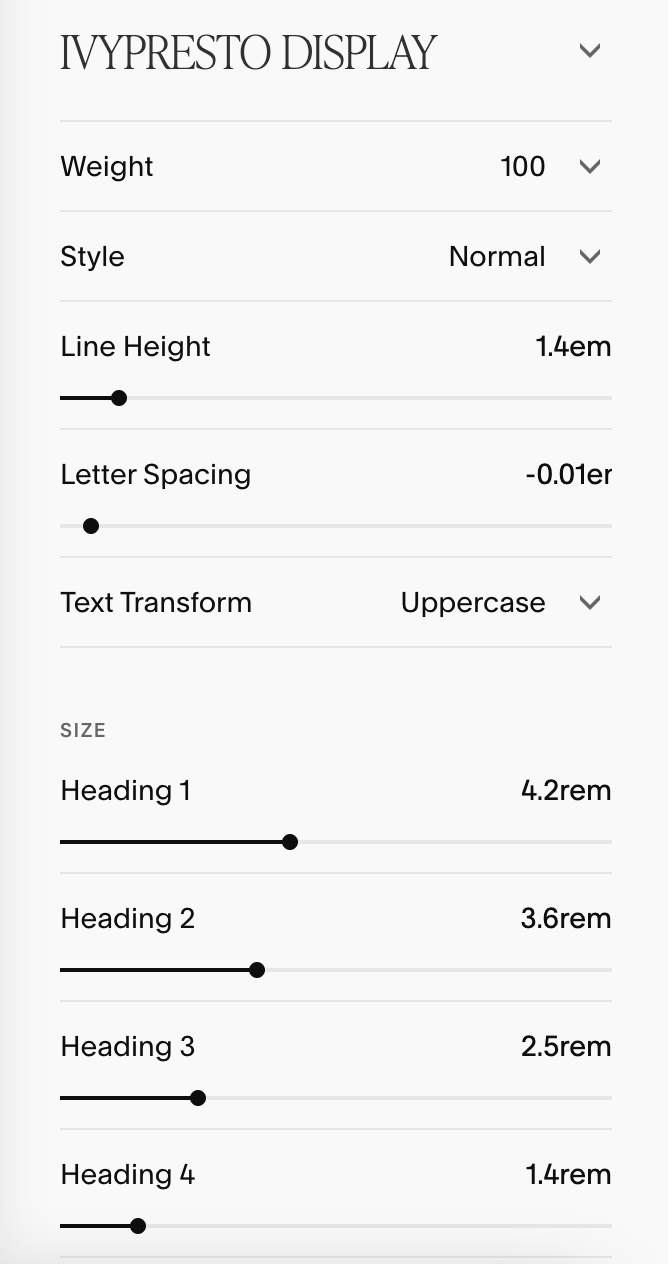
Every Squarespace website includes a set of predefined text styles—four heading sizes, three paragraph sizes, and one monospace/miscellaneous style. This is where you can fine-tune your fonts, sizes, and spacing to create a consistent and visually appealing reading experience across your site.
Here’s a look at the font combination I use for my own Squarespace site! Squarespace gives you full control to customize each text style, including options to adjust font weight (thickness), style, line height, letter spacing, text transform (uppercase, lowercase, or capitalized), and size—for every heading and paragraph.
For the Monospace/Miscellaneous font, keep in mind that the style you set here will apply across your entire site, except for specific elements managed under “Assign Styles” (we’ll cover that in a future blog post!).
In the meantime, feel free to browse my font combinations for inspiration:


Squarespace’s built-in styling editor helps you create a consistent look and feel across your entire website—an essential part of building trust with your visitors. A clean, cohesive design not only reinforces your brand identity but also makes your site easier to navigate and more engaging for potential customers.
Custom code injection areas:
While Squarespace offers a modern, fully customizable design right out of the box—no coding required—it also gives you the flexibility to add custom code if you want to take your site a step further.
If you're just getting started, don't worry—coding is completely optional.
But if you're curious about adding custom elements or advanced functionality, Squarespace makes it simple to get started with code injection.
Here’s a beginner-friendly overview to help you dip your toes into custom code in 5 simple steps:
Please note that these are very simple 5 steps to inject code - not a full tutorial.
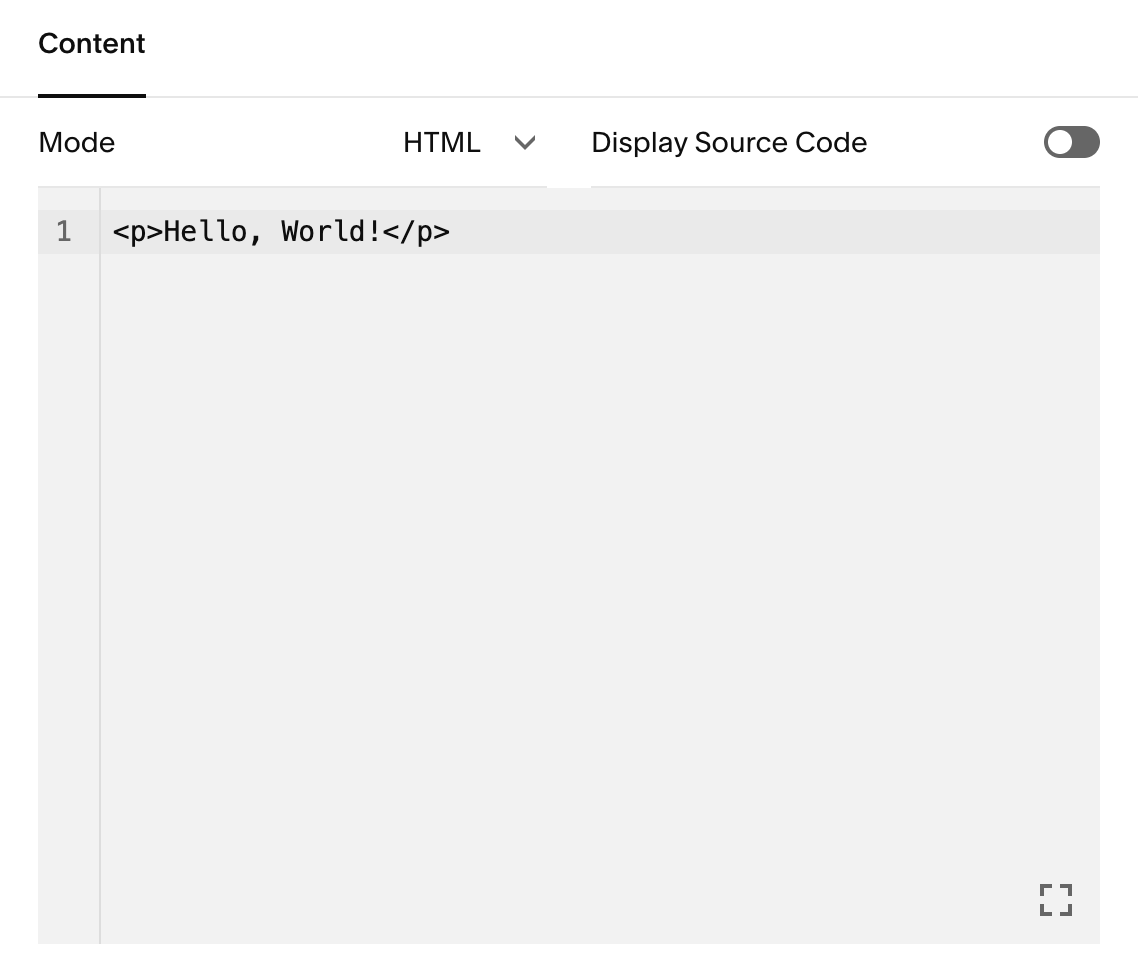
1. Look for the “</> Code” option in the layout box!
2. Drag the (invisible) code box to exactly where you want the custom code to show up on your website, and enter the Code that will accompany the Custom CSS Code!
3. Click on the Search Bar in the left Pop-Up bar!
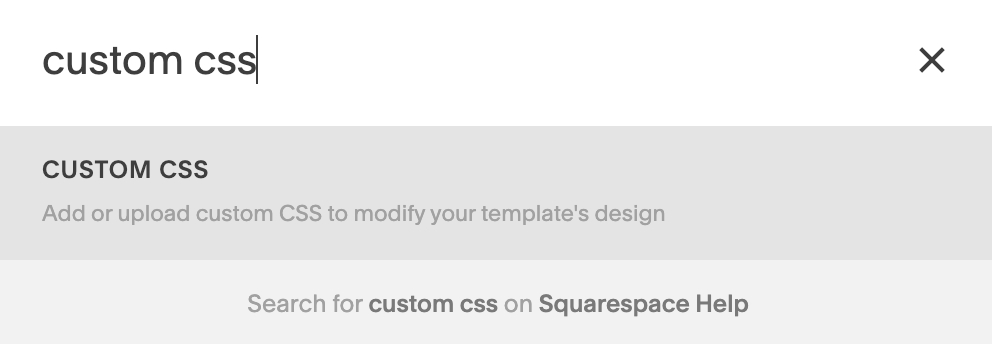
4. Search for Custom CSS!
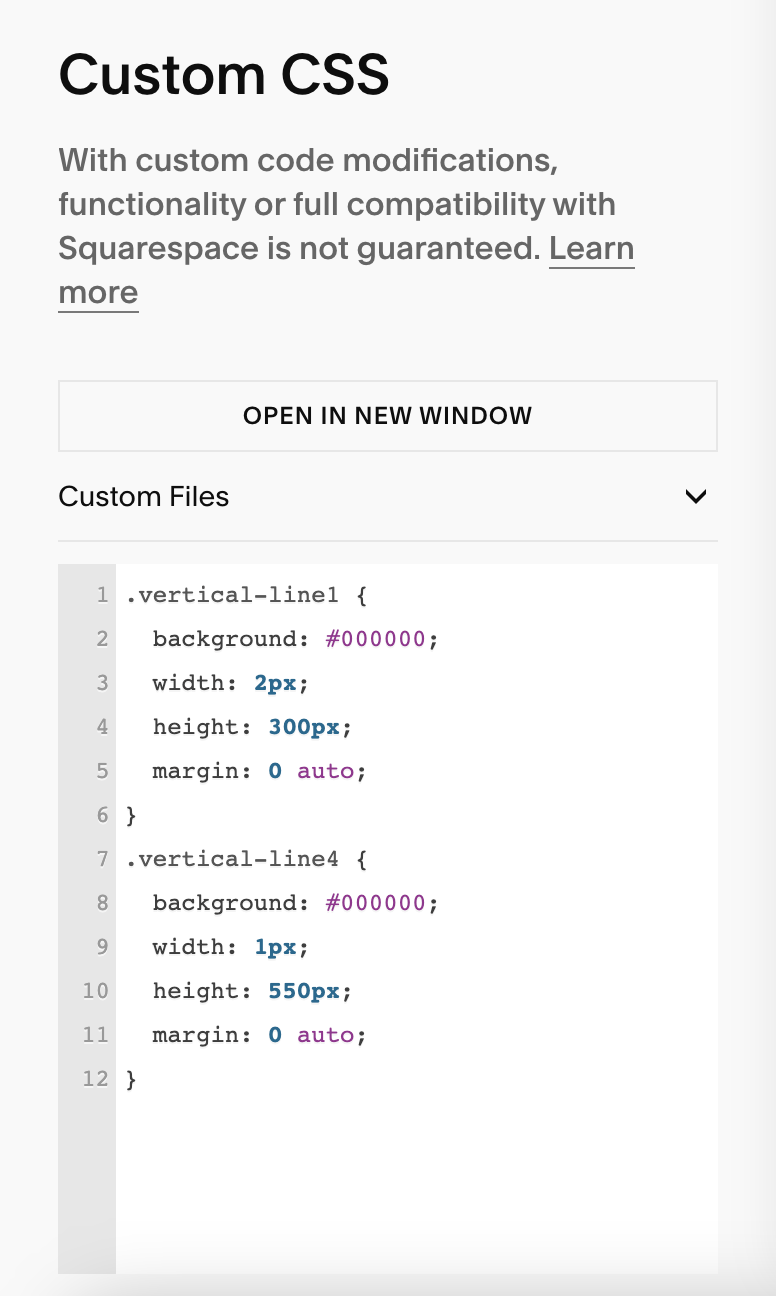
5. Enter your Custom CSS code!
built-in seo tools:
One of my favorite features in Squarespace is its built-in SEO tools—they make it simple to optimize your website in just a few clicks.
You don’t need to be an expert to start boosting your visibility online.
There are many strategies to improve your site’s SEO, but here are a few quick actions you can take today to lay a solid foundation:
Meta descriptions & Image Alt Text:
For a comprehensive checklist of SEO best practices straight from Squarespace, be sure to visit their official guide. It walks you through each step to help improve your site’s visibility on search engines—so you can implement changes at a pace that works for your business.
In an upcoming blog post, I’ll be breaking down each of Squarespace’s SEO best practices with clear, step-by-step instructions.
But for now, let’s focus on one key element you can start using today: Meta Descriptions. Below, you’ll learn why they matter and exactly where to find this feature in your Squarespace settings.
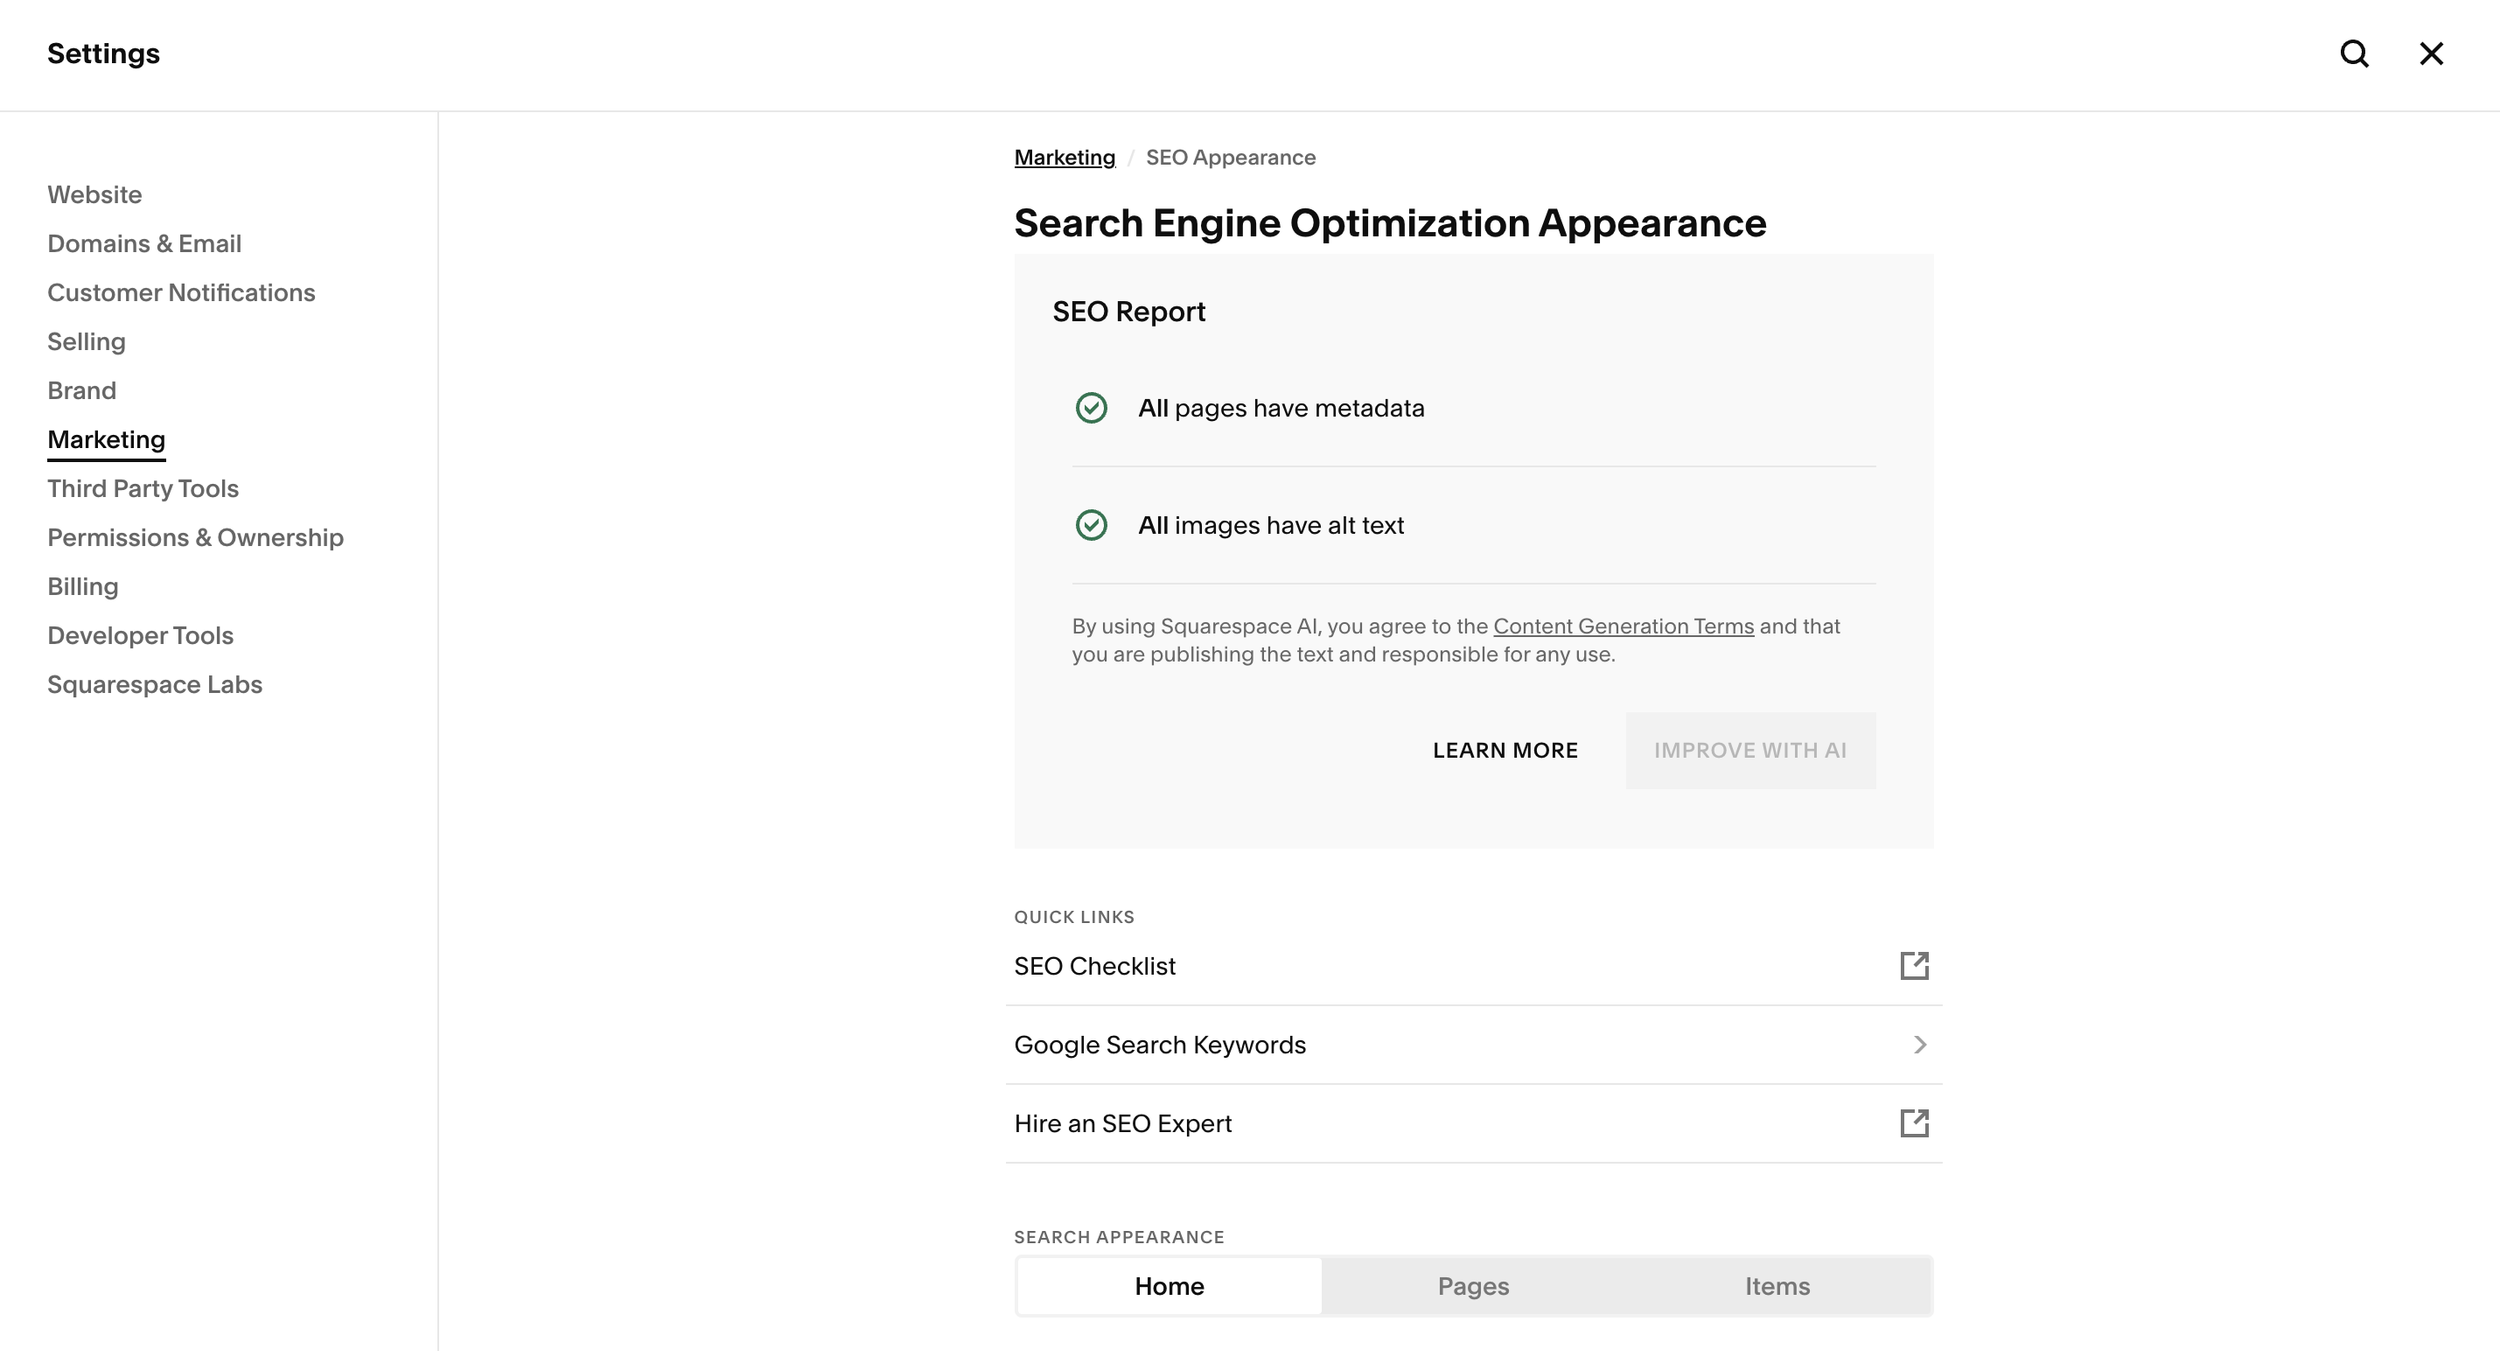
Navigate to Settings → Marketing in your Squarespace dashboard (see image below).
In this section, you’ll find the SEO checklist mentioned earlier, along with the option to edit your site’s Meta Descriptions—the text search engines display beneath your website link in search results.
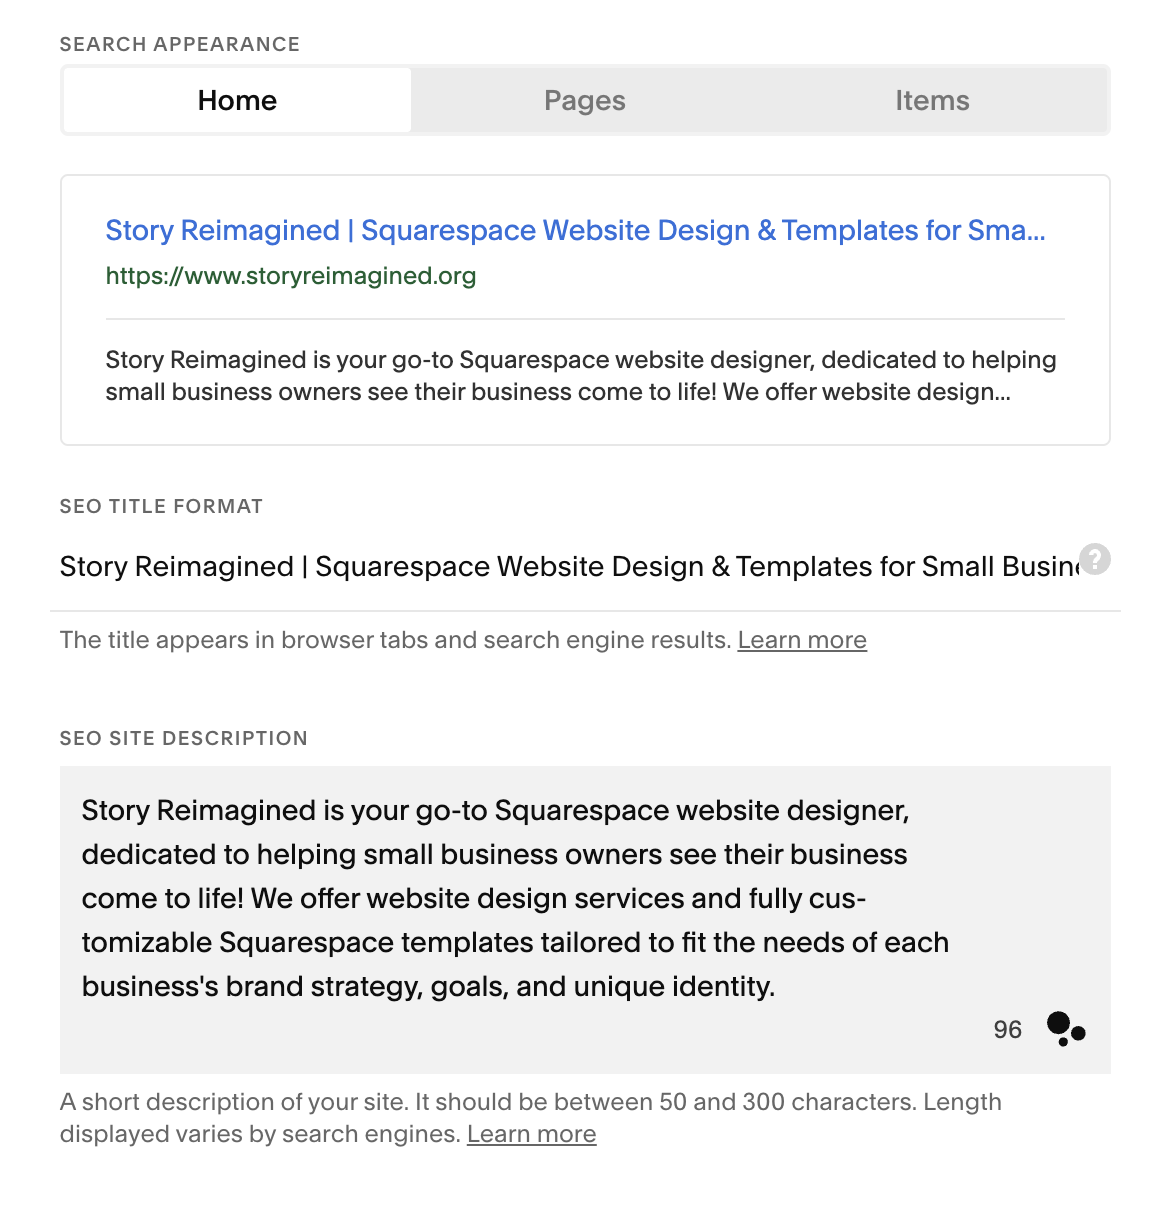
You can view my example meta descriptions on the right for reference:
Make sure the following areas of your website are properly edited and optimized for search engines:
Site Title
Site-Wide SEO Description
Individual Page SEO Descriptions
Image Alt Text
Optimizing these key elements helps improve your site's visibility and ensures your content is easily understood by search engines like Google.
Squarespace offers a built-in AI tool that helps you quickly optimize your website images by enhancing alt text and metadata (as shown above). With just one click on “Improve With AI,” you can automatically generate SEO-friendly image descriptions in seconds.
This is just one of several easy ways to start boosting your website’s SEO—and it's one we highly recommend for improving both accessibility and search visibility.
clean url’s:
Another simple way to improve your website’s SEO and user experience is by cleaning up your page URLs.
Clear, concise URLs make it easier for both search engines and visitors to understand and navigate your site.
To get started, view and edit your page URLs here (this is an example using my own website):
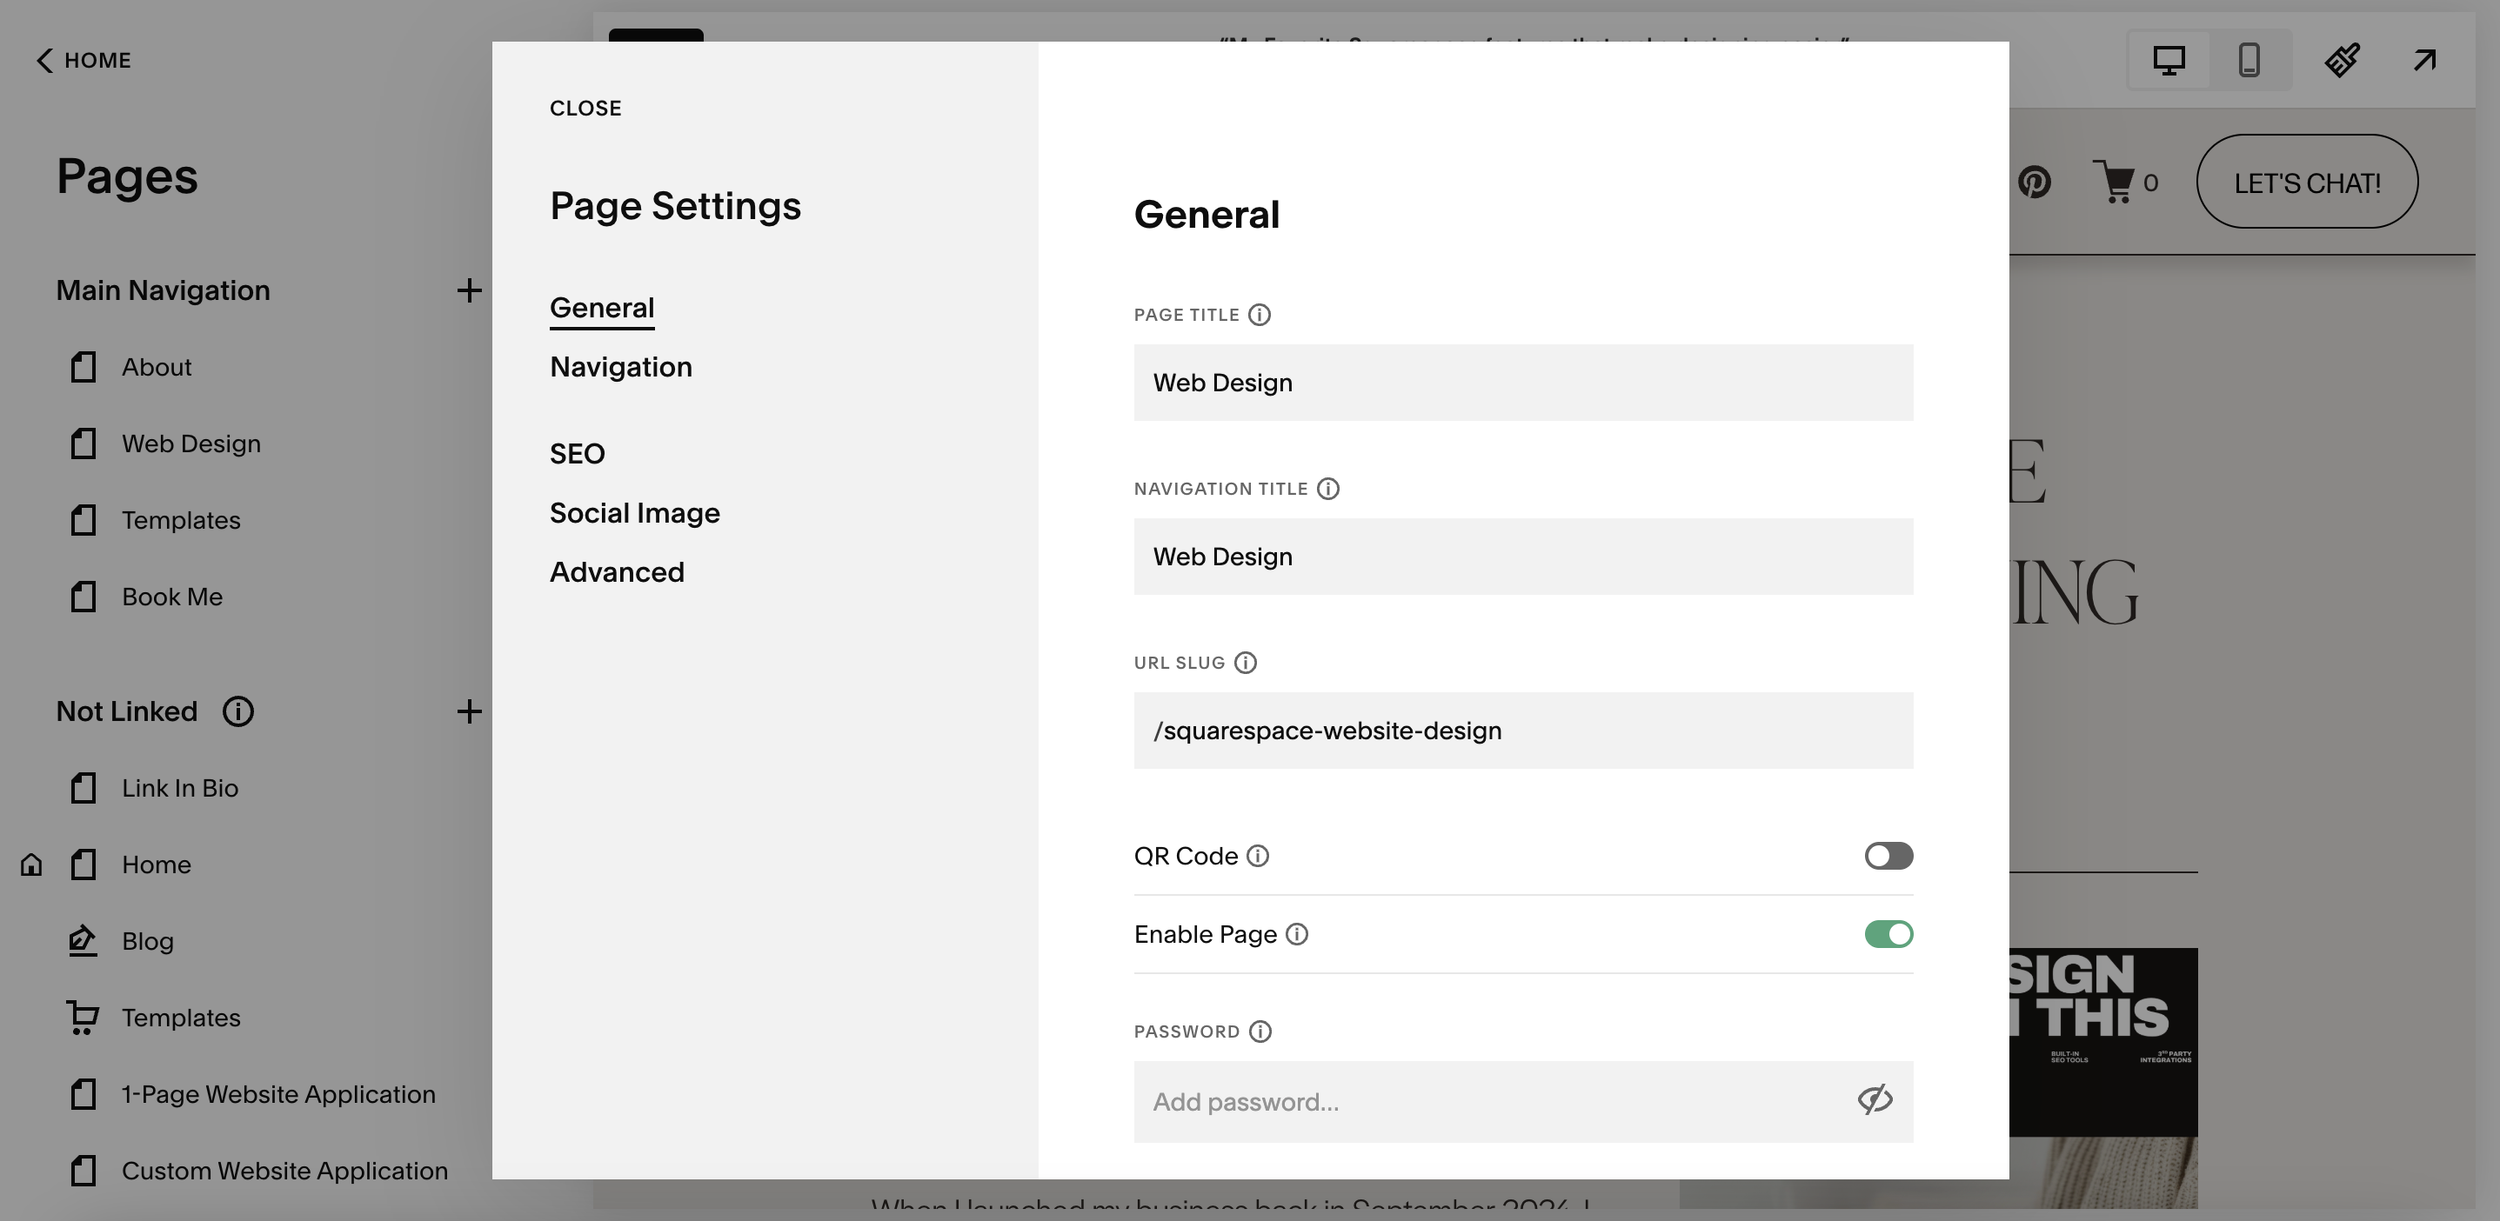
The image above shows an example of a URL slug. To improve both user experience and SEO, make sure your Page Title (visible under “Pages”) and Navigation Title (what visitors see in your site’s menu) clearly reflect the content of that page.
Don’t be afraid to get creative with your URL slugs—use keywords that match what people might be searching for.
This helps search engines better understand your content and drives more targeted traffic to your site.
BOnus: Third-Party Integrations
Below are some of the third-party integrations available directly within Squarespace. With just a click, you can easily connect tools
for marketing, e-commerce, email campaigns, finance management, and more—
helping you streamline your workflow and grow your business with ease.
You also have the option to embed custom code into your Squarespace website, which is especially useful for integrating certain third-party tools directly onto your site.
For example, platforms like HoneyBook allow you to copy and paste embed code from their forms or questionnaires into Squarespace. This lets your visitors interact with these forms without ever leaving your website, creating a smoother and more professional user experience.
Fin!
For all the reasons mentioned above (and more I’ll be sharing in future blog posts), Squarespace is my top choice when it comes to website building platforms. Its modern design, powerful features, and user-friendly interface make it an ideal option for anyone looking to DIY their website—whether you're just starting your small business or scaling to the next level.
Ready to launch your Squarespace website faster?